How to remove your oven door
The video below will show you how to take off and replace your oven door.
For most repairs we recommend that the door is removed. This will enable you to lay it flat on a table whilst you apply the glue, and allow the glue to cure. It will avoid the use of clamps trying to hold everything in place. Removing the door is usually quite simple, and is well worth the few minutes it will take.
We hope you found the video useful if so please help us…
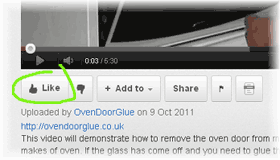
Please give the video a “Like” on the You Tube video page (link opens in new page), the “Thumbs up” like button is just under the video as shown in the graphic below.
Highly recommend this product!!. Gentlemen on phone was very helpful, thanks very much
Posted by Maria Hirst on Tuesday, 17 March 2020
Removing the fascia (front) panel.
Once you have removed the door from the oven (see video above), you may need to remove the fascia panel so as to be able to access the brackets inside the door casing, or the internal glass. All ovens manufacturers differ, and they even differ between specific models. However most oven doors are made with a metal casing, which acts as the inner part of the door and contains the inner window, and a fascia panel, usually made of glass but may have metal decorative panels.
On most ovens the fascia glass is held in place either by brackets that are glued onto the inside face of the fascia glass, and so not visible from the outside, or by a combination of these brackets, typically at the bottom of the door and the handle at the top.
The brackets, that are glued to the inside of the fascia may then be screwed to the door casing, or use a hook and eye type arrangement. This allows for the fascia to be removed by unscrewing the brackets, or the handle, or both.
With the door removed have a good look around the edges of the door casing to see if there are any screws that are potentially holding a bracket inside the casing. Usually these will be at the bottom of the door, and so hidden when the door is in situ. Unscrew the brackets holding the bottom of the glass. It may then be possible to slip the glass from under a handle at the top of the door, and remove the glass. Alternatively the handle may screw through the glass at the top, and will need to be removed. A further alternative is that the top of the glass is also held in place with similar brackets glued to the inside face of the glass and screwed into place.
Some Fascias are held with brackets glued to the inside of the glass at the bottom, and by the handle at the top, as above, however the bracket at the bottom is not screwed to the casing of the door, and so no screws will be evident. Instead the brackets glued to the inside of the fascia glass hook over prongs on the casing, behind the glass. Effectively these prongs are a much larger version of the hook and eye fixing that you find on some clothing such as the waistband of some trousers. As before, the top of the glass may be slipped behind the handle, or have the handle screwed through it. To remove the fascia the handle is first removed, freeing the top of the glass, the glass is then lifted up, lifting the brackets glued onto the inside of the fascia, up, over the prongs. If there are no screws evident assume this method of fixing before moving on to the possibility of a spring catch, or the door being glued all around.
On a very few ovens the brackets are not screwed to the door casing. Instead they use a spring clip method (similar to a cupboard door catch), so the brackets on the rear of the fascia are pushed into place into the door carcass. Clearly there will be no screws in this case. Instead you have to very gently prise the glass up away from the casing so the brackets pop out of the cupboard door like latch. Needless to say you need to be extremely careful not to stress the glass, and be sure that this is the actual holding method.
Sometimes a torch aimed inside the loose inner glass door, down to the bottom of the door, will help you locate the position of any brackets.
There are a very small number of ovens where the front glass has been glued into place, but this is very rare.
Hopefully, your fascia plate will be relatively easily removed, they are in the vast majority of cases. In which case the repair is relatively simple and very successful. The removal of the door and the fascia can usually be completed in less than 10 minutes.
Gluing around the perimeter of a panel
Sometimes the glass is glued around the perimeter of the glass, directly to the metal of the oven door – without the use brackets. This is most often the case with the inner glass. The oven door glue is perfectly suited to gluing the glass around the full perimeter where this was the original method used. Because you have a larger surface area to glue the quantity of adhesive used is increased
Ovens do vary and for some larger panels of glass a second tube of adhesive may be needed if it is to be glued around the full perimeter. As a guide, a single tube will provide a bead of adhesive 5mm wide, by 2mm deep (the cross section we would generally recommend), over a 1200mm length (approximately 48 inches).
The 5mm width of bead will provide sufficient surface area to hold the glass strongly in position. The 2mm depth of adhesive is intended to provide a cushion between the glass and the metal to allow for thermal expansion as the oven is used. The adhesive cures to form a rubber like material and so will stretch to accommodate the expansion of the glass, without compromising the strength of the bond.
Please check whether a 2mm depth will be suited to your oven door glass. When the hole is cut in the metal part of the door for the glass, as part of the manufacturing process, the edge of the cut is sometimes rolled over to create a lip. Normally this lip is very shallow, and so a 2mm depth of bead is fine. On a few models of oven the lip can be deeper, and so a deeper bead may be required.
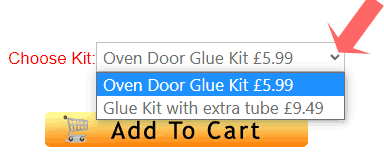
We have provided the opportunity to purchase an extra tube of adhesive at the same time as the original kit, through the website, should you need it. Our postage charge does not change. This will save you money on buying two kits.
To choose the kit with an extra tube use the drop down arrow in the “choose kit” box, and select the Glue Kit with extra tube as shown in the image below. You will need to visit the product page Oven Door Glue to choose the kit

If in doubt please feel free to purchase the extra tube, should you find you do not need it, please return the unopened tube in the box we send the kit to you in (turn the box inside out) within 14 days, for a refund of the £3.50 purchase cost. The refund will be paid back to the payment card used. That way you can be sure to have enough to complete the task, without incurring undue cost. Please include a note of your purchase details with the return so that we can make the refund.
As always, you are welcome to call us for advice on our Freephone helpline 0800 410 1222

